Home | Graphics | Husqvarna Graphics | Husqvarna FS 450 2019-2022 Graphics | Husqvarna FS 450 19 – 22 Graphics | Factory 3A




 Standard
  Chrome
  Holochrome
  Metallic
  High gloss
  Matte
Matte  Grip
Grip  Glitter
 Character Limit
Character Limit
Upload Logo 1
Upload File
Remove
Upload Logo 2
Upload File
Remove
Upload Logo 3
Upload File
Remove
Upload Logo 4
Upload File
Remove
Upload Logo 5
Upload File
Remove
Upload Logo 6
Upload File
Remove
Character Limit
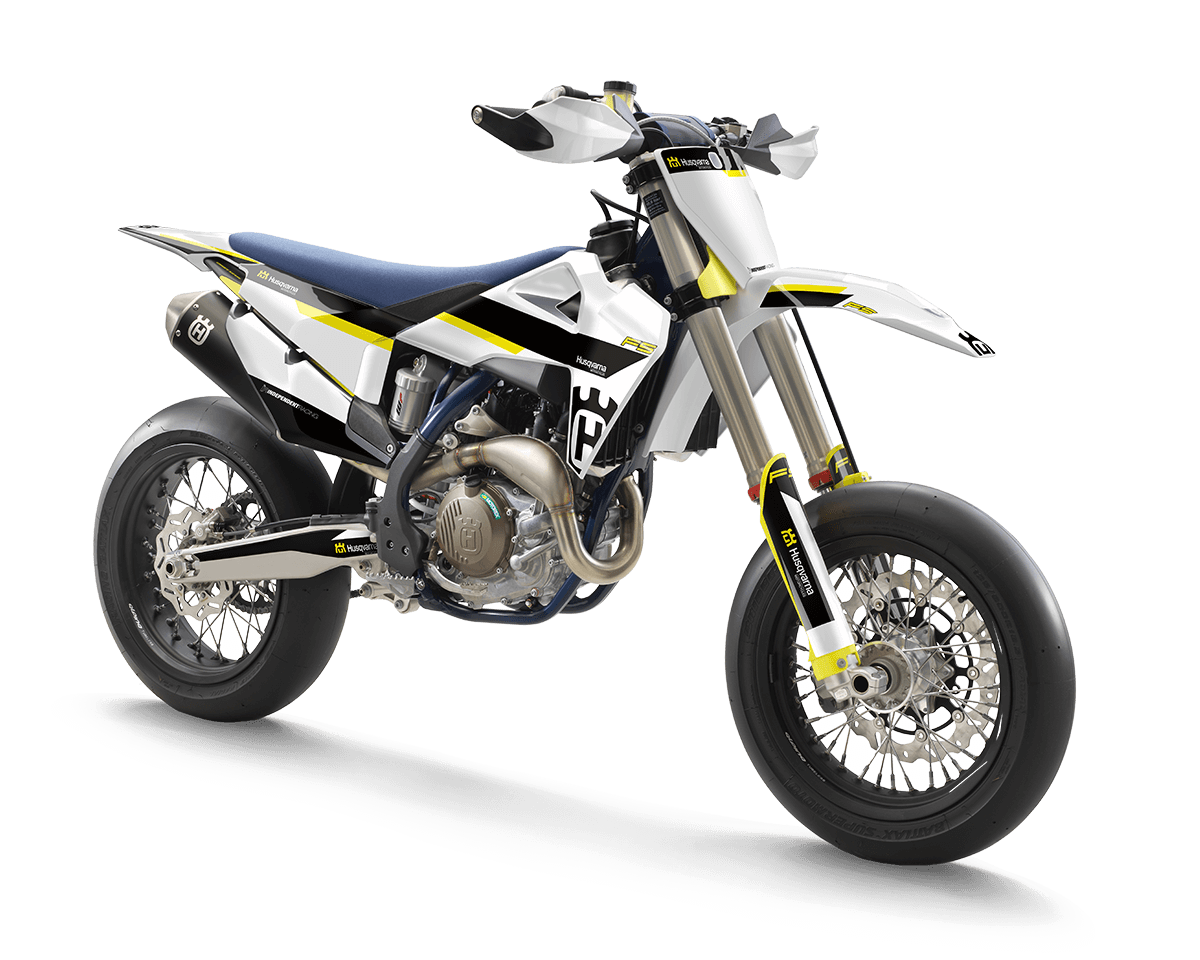
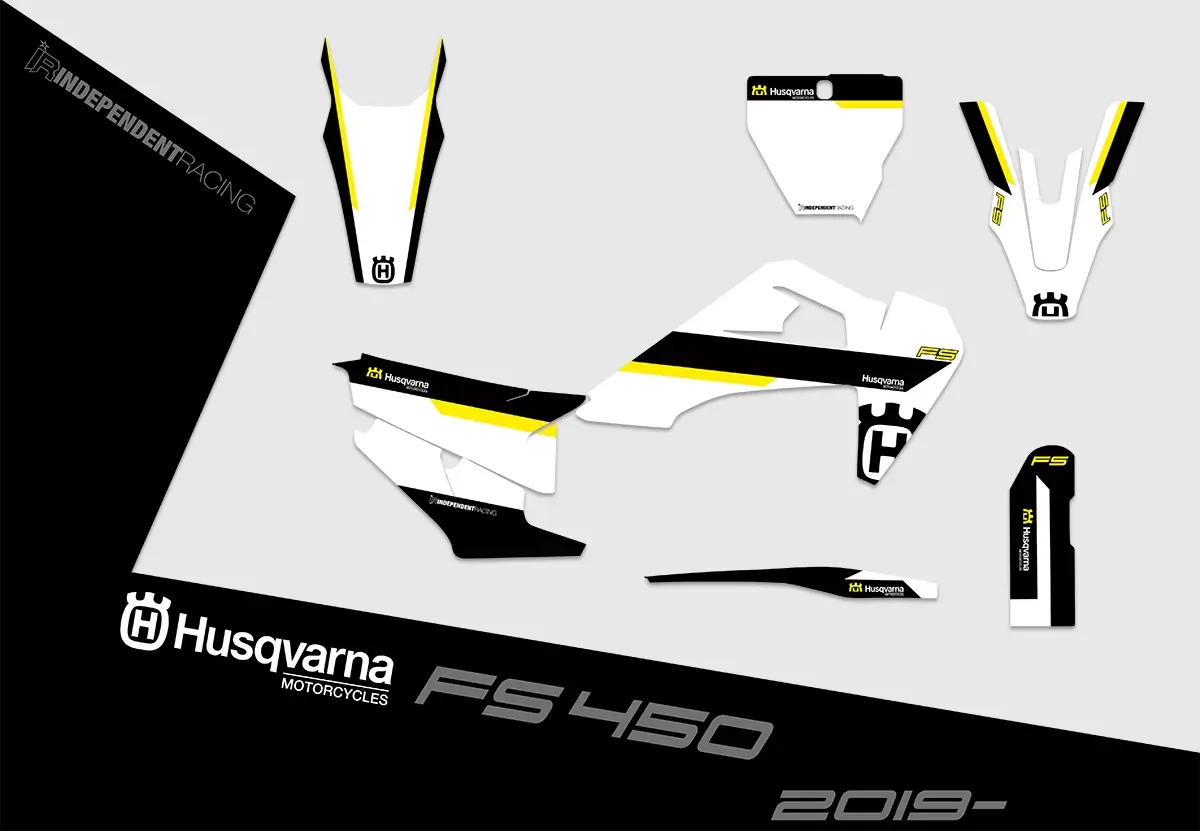
Our Husqvarna FS 450 graphics are truly special, highly durable, and flexible stickers with optimal adhesive strength. The graphics kit arrives at your doorstep as individually cut pieces tailored to fit specific areas – making the application a breeze as you align them with your fairing parts. In contrast to complete wrapping, as you might know from cars, the stickers do not have to be pulled and then cut, but fits directly.
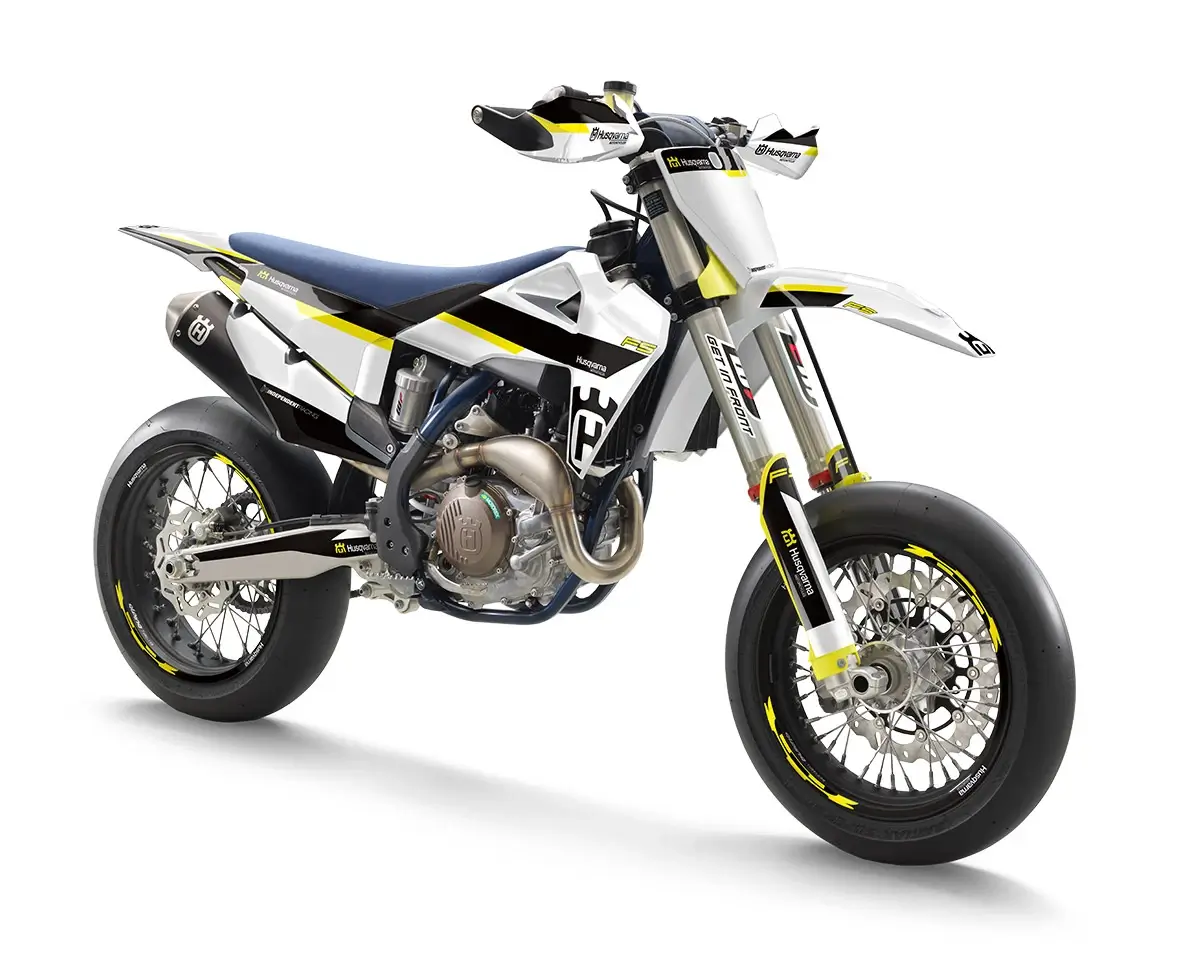
Due to our unique film thickness (0.8 mm), achieving complete edge-to-edge coverage on all surfaces of the fairing might be challenging. As a result, some parts of the fairing will remain visible. The product image closely resembles reality, providing a reliable guide for application!
Thanks to the high-quality film, our decals are not just a visual highlight – they also protect your fairing parts from wear and tear (such as rubbing from boots, knee protectors, etc.). We match all brand-specific colors (e.g., KTM & Husqvarna) with 98% accuracy – so you can rest assured that the decal colors will closely match those of your motorcycle. No need to worry about discrepancies in decal colors compared to your bike.
Select all the features in the configurator to see the final price displayed. Du kannst im Konfigurator Basis, Finish, Handschalen Aufkleber, Felgenaufkleber und Gabelschutzaufkleber auswählen. Auch Individualisierungen sind möglich. You can find more details about this under order options.
For more information about the graphics, check out the additional points:
Order options – Learn here about the various features you can choose.
Material – Learn more about our special graphics film.
Installation – See how to easily apply the graphics with our step-by-step guide.
Set the fundamental look of your graphics. This is the printing film we use for the kit.
Complete your design and choose the final surface
A specially textured surface with a non-slip effect—perfect for off-road or racing conditions
You have the option to complement the main graphic with handguard stickers for many models. The handguard stickers perfectly match the design of the graphic kit and complete the look of the bike. The handguard stickers cost €29.95.
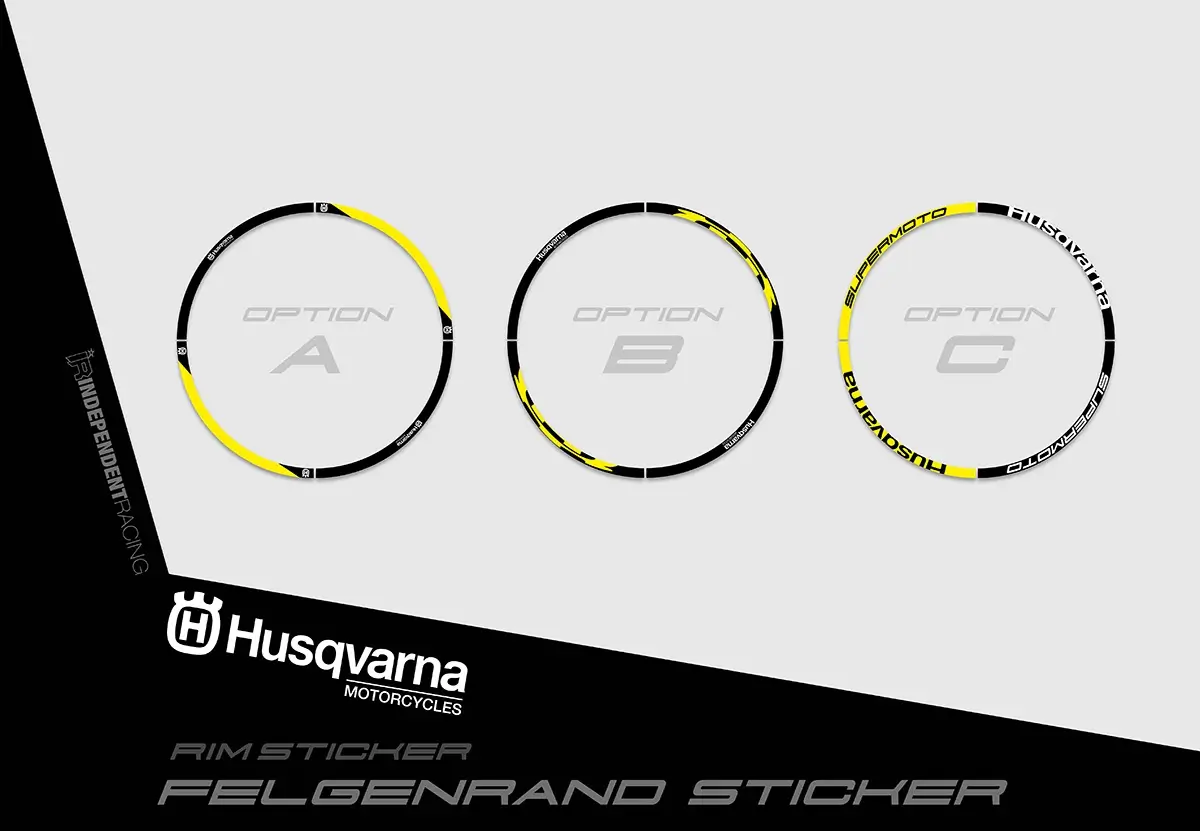
A graphic alone isn’t enough and you want to maximize the design potential? Then our wheel graphics, which match the graphic, are the perfect choice for you! The rim stickers give your bike a unique look and complement your graphic kit. The wheel graphics cost €39.95, and you will receive stickers for both sides on both rims.
Stone chips on the fork tubes are not uncommon and very unsightly. Protect your fork tubes with transparent WP logo fork protection stickers – protection and style in one. The WP stickers are available for €9.95.
You have two different options for the feature „Number”:
If you want your own number on the graphic, that’s no problem. Simply choose the “Custom Number” option, and a field will appear where you can enter your number. You can also select the font and color for the number. The view is just for reference – our graphic designers will adjust the size and position of the number perfectly. The “Custom Number” option costs €10 extra.
For the “Name” option, you have three choices:
If you select your own name, an input field opens in which you can enter your name. You can then select the font and color of the name. This view is only for your convenience. Our graphic designers will then adjust the size and position of the name perfectly. If your name is very long, it may not fit perfectly on the surface in the view. The graphic designers will also adjust this. The “own name” option costs €5 extra.
For the “Custom Logos” option, you have two choices:
Wenn du ja bitte auswählst, kannst du bis zu sechs Logos auf dem Dekor platzieren. In der 3D-Ansicht werden der Front- und Heckkotflügel mit den Logopositionen eingeblendet. Es öffnen sich im Konfigurator mehrere Felder. Hier kannst du nun pro Logoplatzierung entweder ein von uns bereitgestelltes Szene-typisches Logo auswählen (z.B. Brembo WP, Akrapovic), ein eigenes Logo hochladen oder “kein Logo” auswählen, wenn du an dieser Stelle kein Logo haben möchtest. Auf der 2D-Ansicht kannst du alle Logoplatzierungen nochmal genauer sehen.
Custom logos cost an additional €25.
Lastly, you have the option to receive a preliminary design by email. If you’ve made customizations (name, number, logos), you can receive a 2D preview of your graphics. This allows you to confirm that all your requests have been correctly implemented. The email preview option costs €20.
You can choose from ten different fonts for both the name and number – Styles A through J. Some fonts support only uppercase or lowercase letters, while others support both. You can preview the fonts in the configurator. Additionally, you can freely choose colors for the name and number from a wide color palette. Please note that there may be slight color variations in printing, meaning the printed colors may differ slightly from those on the screen. Our designers always adjust the colors to match the rest of the design perfectly.
You can find all the important information about fonts and colors in the following images.
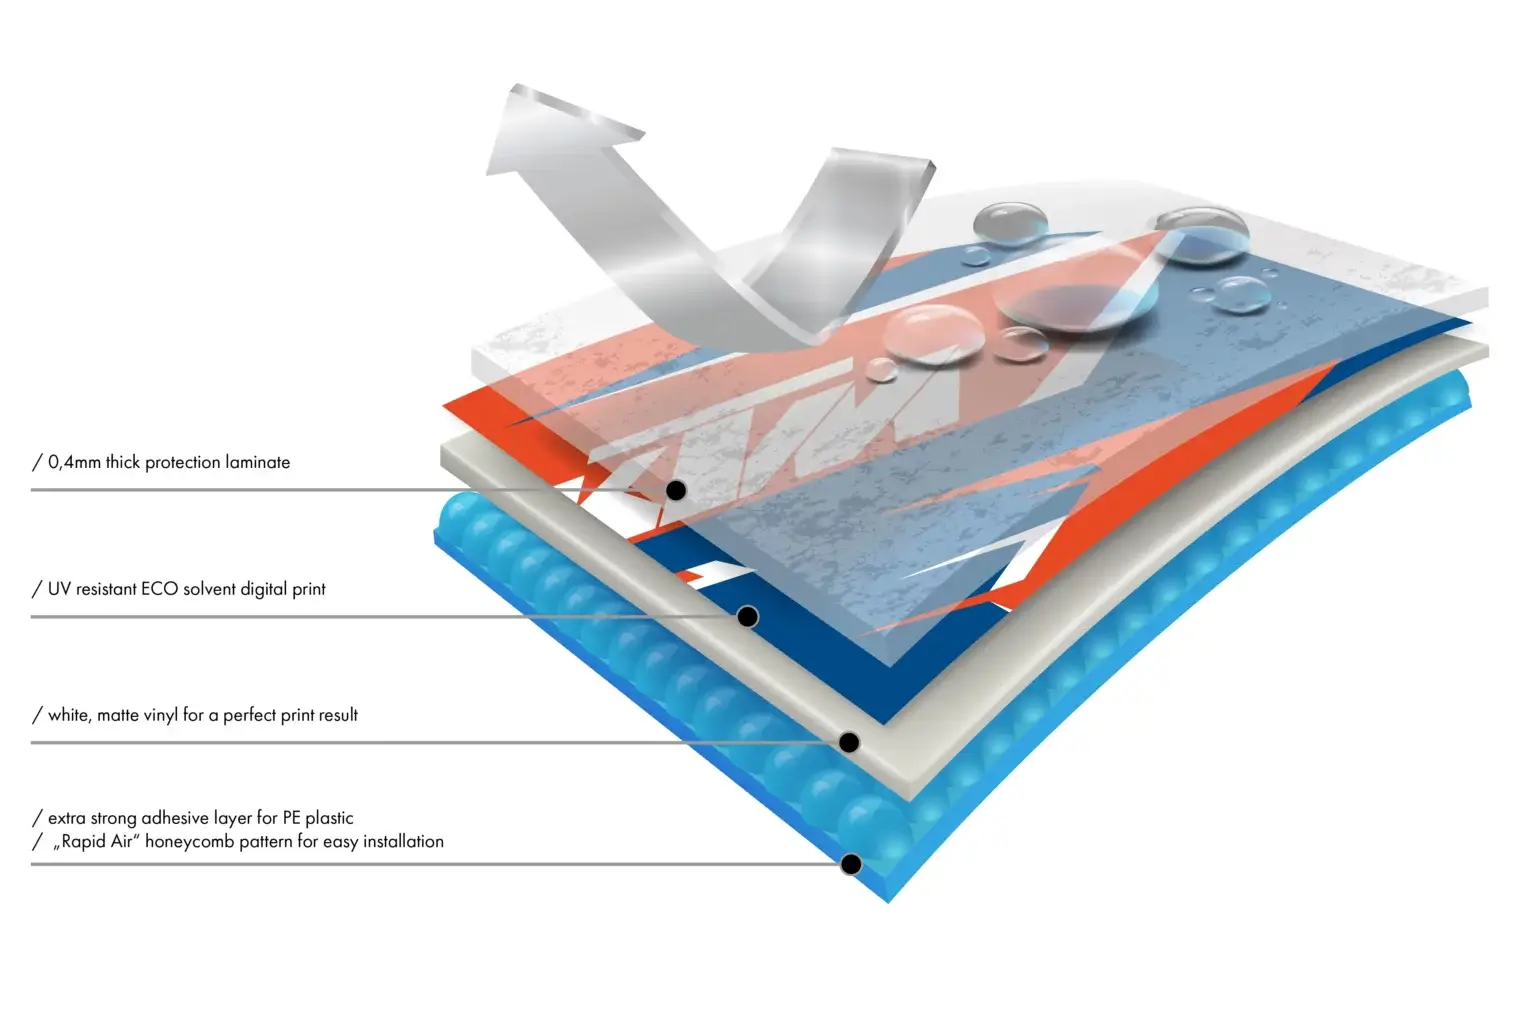
When you think of “stickers”, of course, quite ordinary stickers or foils for full vehicle wrapping come to mind. Since these materials are usually very thin and difficult to process, the mere idea of wrapping an entire motorcycle causes sweating. But don’t worry – the multi-layer film structure has been specially developed by us for the use as motorcycle decals and has been continuously optimized over the course of 8 years. A special acrylate adhesive with a honeycomb “RapidAir” pattern is used as the basis for optimum adhesive strength on PU plastic parts. These channels make air inclusions in the decal a thing of the past and the film can be easily applied, even for inexperienced hands.
The UV-resistant ECO solvent print, known for its brilliant print quality and long-lasting color fidelity due to its special composition, is applied to a matte, highly stable vinyl film. The matte base ensures that all printed details stand out perfectly.
Our multi-layer film is completed with the “heart” – the 0.4mm thick protective laminate! The laminate ensures a long durability of your stickers and is very resistant to external influences. This way, your fairing parts are ideally protected against scratches or fading – style and protection in one! Due to the total thickness of approx. 0.8mm, it is practically impossible to get wrinkles or creases in the decal when applying.
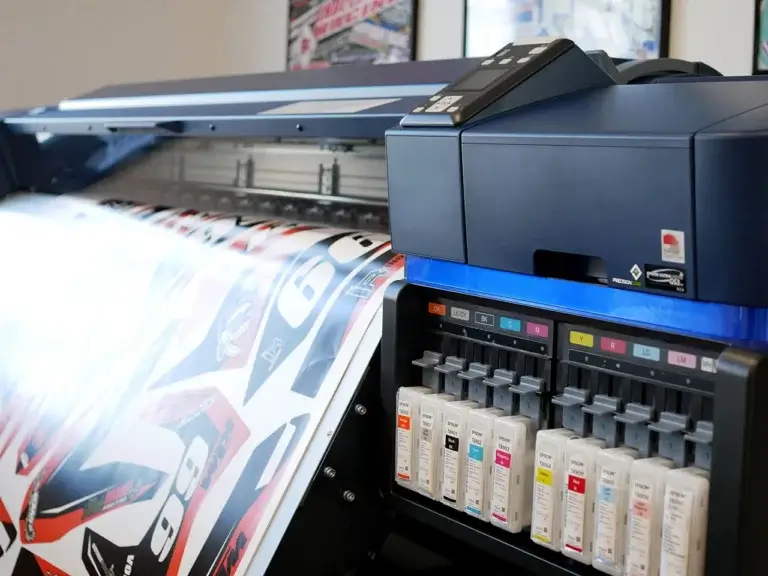
Our 9-color, dual printhead systems based on ECO Solvent meet the highest demands of modern printing technology.
Compared to conventional 4-color single-head systems, the advantages are clear:
– higher color accuracy
– reproduction of intricate details can be reproduced
– more stable color pigmentation
– no color casts in gray tones
– pure gray
– faster drying times, therefore no evaporation under the laminate layer
Our printing systems are replaced or updated annually in order to always guarantee the highest standard of printing access.
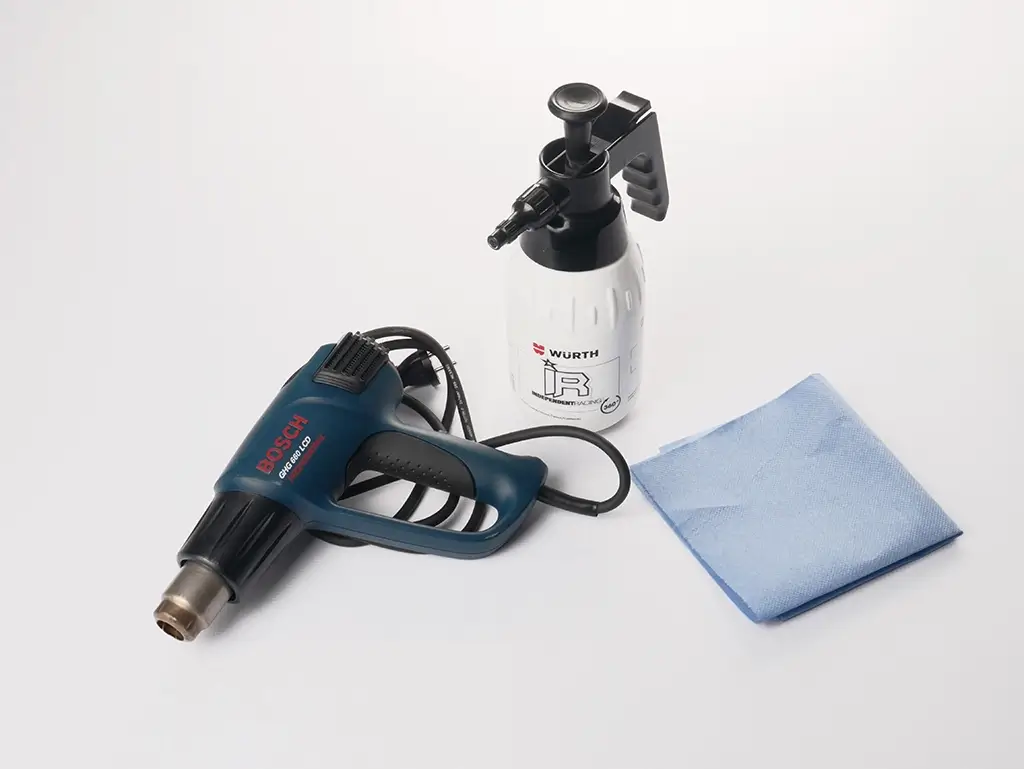
For an optimal result you need:
It is often shown that graphics should be applied with a so called “squeegee”, as in e.g. a full car wrap. Since the film has completely different thickness than other wrapping films and the plastic parts are very “organic” shaped (many bends, arcs, etc.), you can only work felxibly with a squeegee to a limit extent. We recommend applying, purely with your hands. This means that the film can optimally adapt to the surface when it is applied.
The preparation of the parts is crucial for the subsequent adhesive force – you should work very carefully to achieve a nice end result.
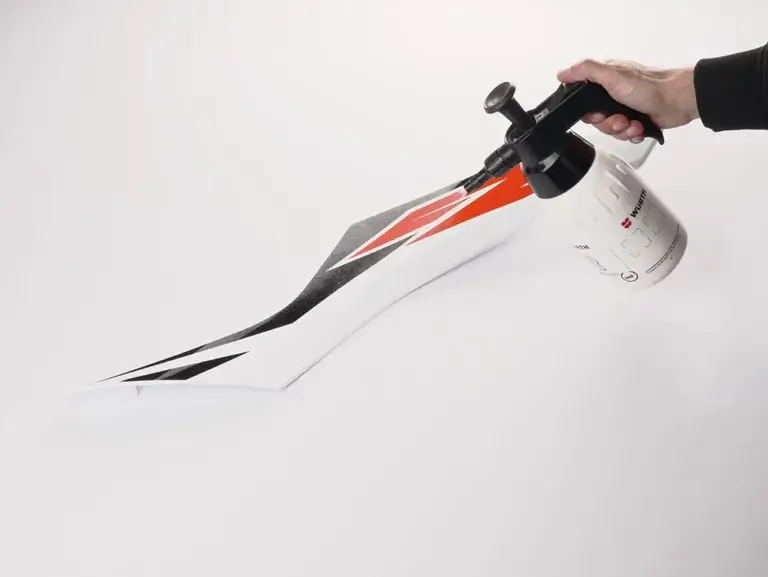
Step 1: Spray the plastic parts thoroughly with brake cleaner.
The alcohol in the brake cleaner degreases & cleans the plastic parts.
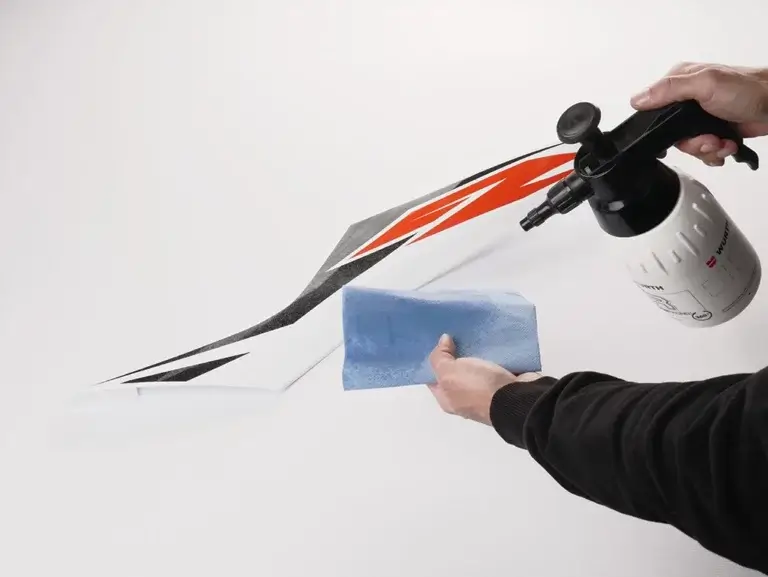
Step 2: Soak the cloth with brake cleaner as well.
This will ensure that not everything has evaporated on the parts by the time you get to wiping.
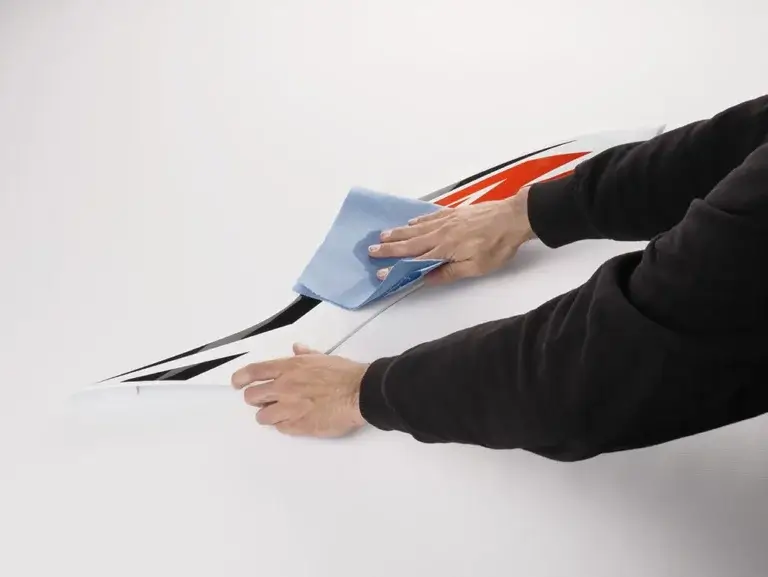
Step 3: Now rub the part until the surface is sligthly matt. When the parts become matt, the greasy layer of the plastic parts has been removed and an ideal base for the decoative adhesive has been created – similar to sanding before painting
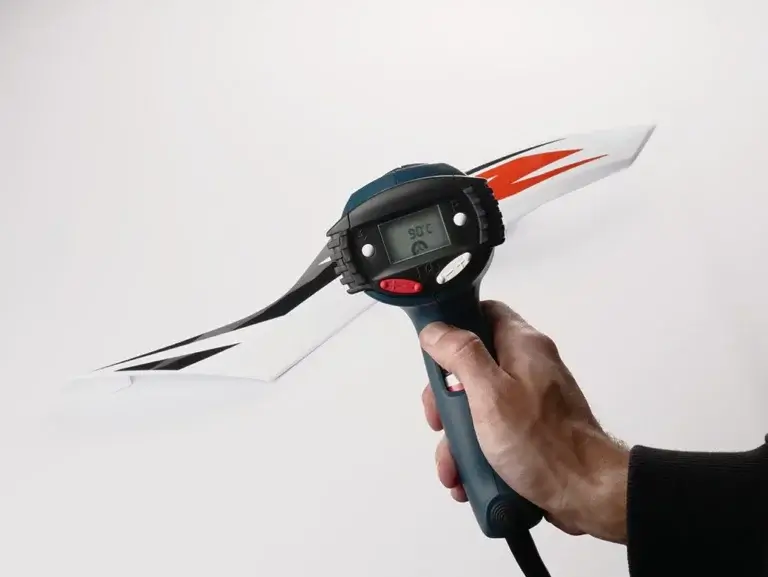
Step 4: This is where the hair dryer or hot air dryer is used for the first time. If you use a normal household blow dryer, just set it to the warmest setting. With a hot air dryer please be sure to use up to max. of 90 °C.
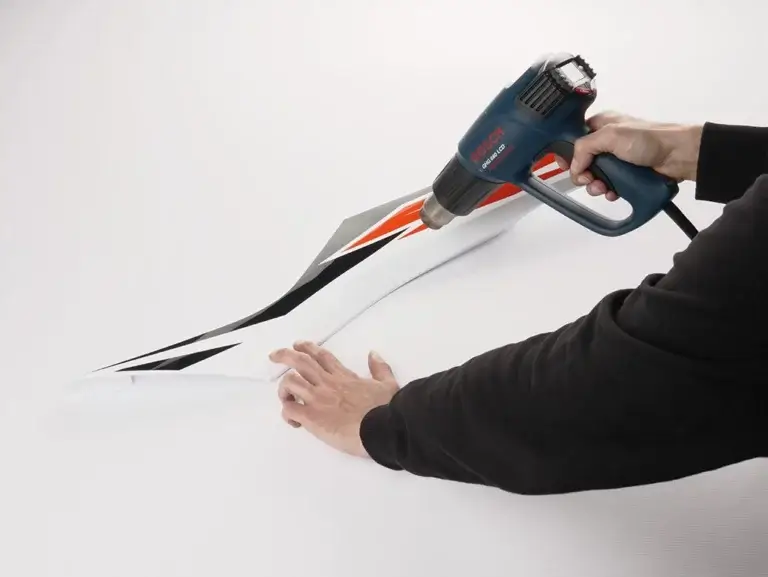
Step 5: Now briefly heat the plastic parts so that they are lukewarm.
Please take care not to blow-dry in one place for too long.
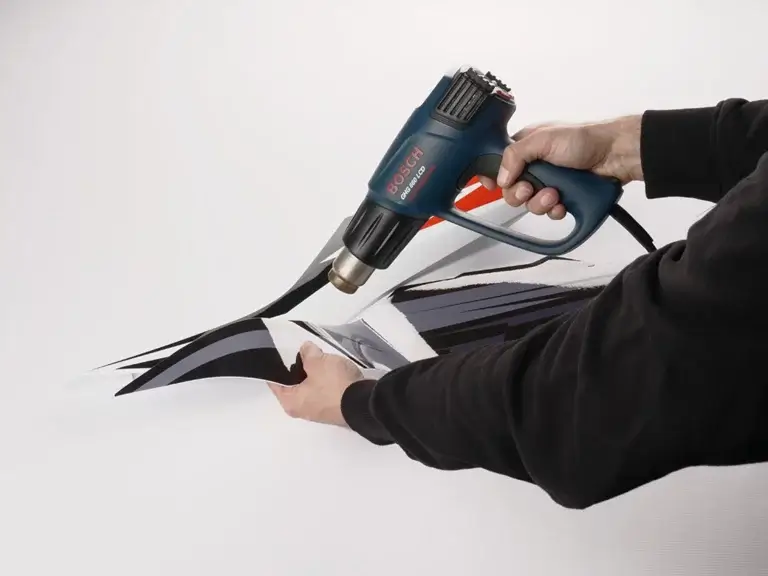
Step 6: Now carefully heat the decorative film until you notice how it becomes softer (Caution: do not heat too gently, as it may cause the shape to deform). When the film is soft, it is much easier to apply it around curves and edges.
Before you remove the backing paper from the adhesive side, the best thing to do is to position the graphics on the part to be applied – this will give you a better feel for the shape.
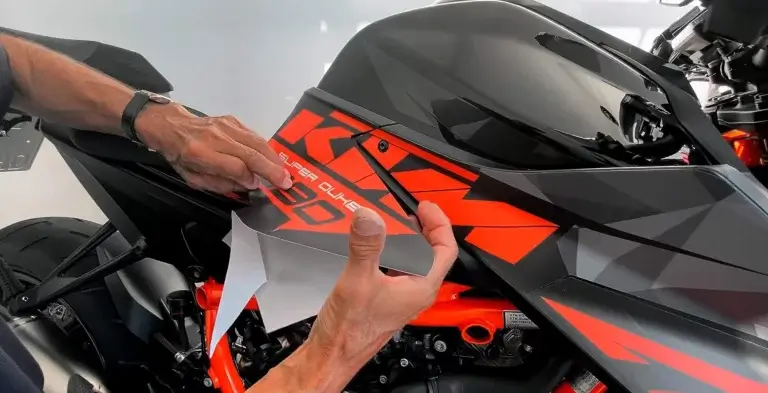
Follow the guide step by step. You’ll see, with a little practice you’ll soon be a pro.
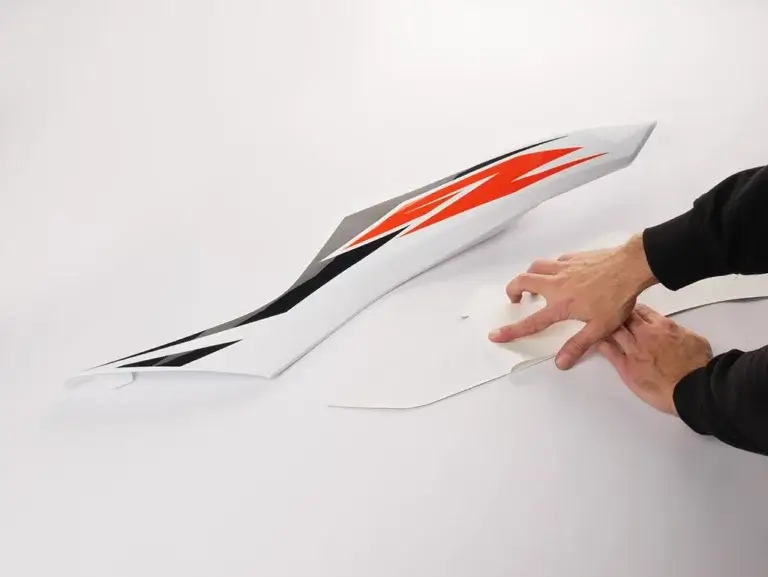
Step 1: Now peel off approx. 1/3 of the backing paper and fold it flat.
The sticker is easier to align on the part if not everything is stuck down yet.
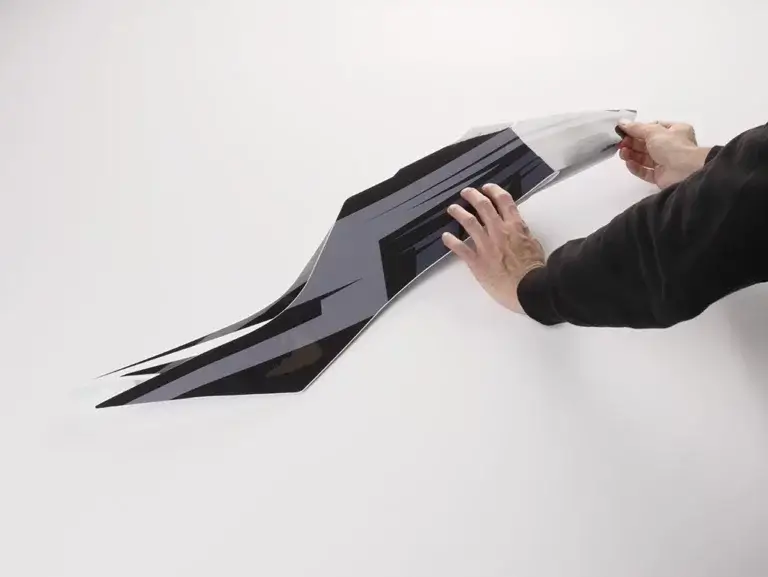
Step 2: Position the sticker in the plastic part. Make sure that the sticker is correctly positioned at the other end. Now lightly press the side with the free adhesive and check whether the direction is correct.
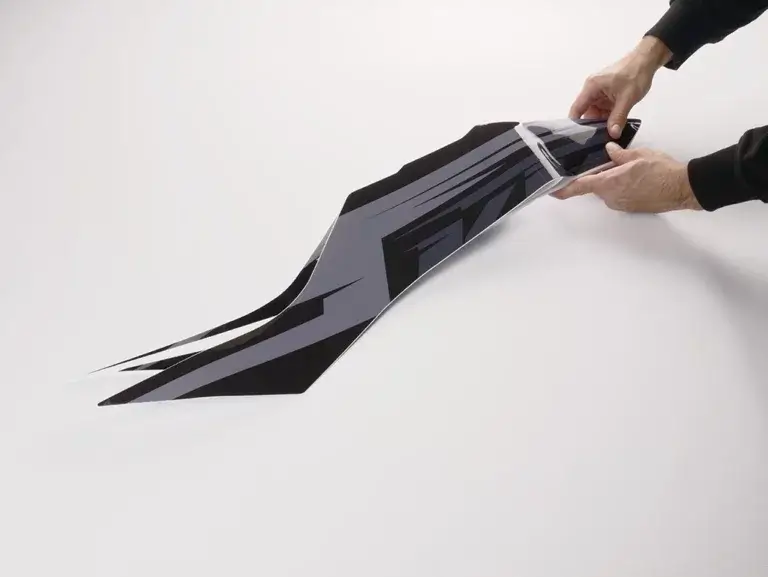
Step 3: If the position is correct, then press the adhesive surface on until everything is firm. Thanks to our “Rapid Air” technology, bubbles under the film shouldn’t be a problem. Always stroke from the center outwards.
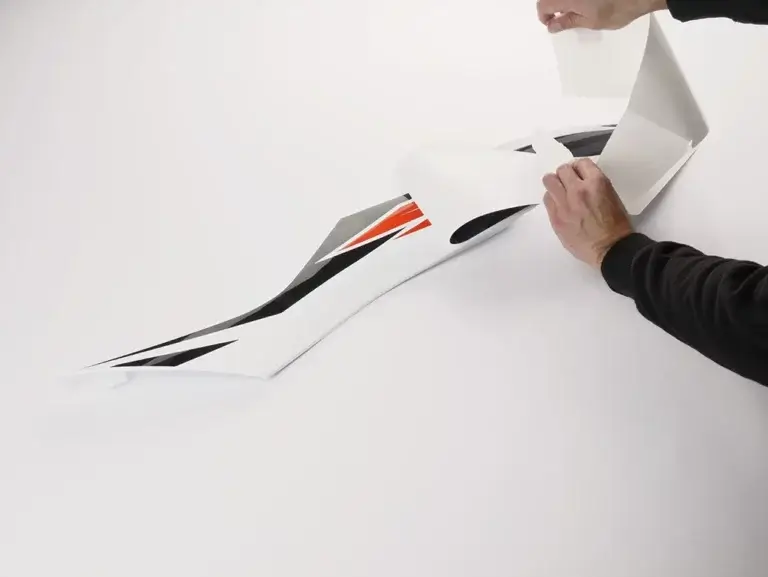
Step 4: Now loosen another part of the backing paper and stick on little further. You can always remove the rest of the backing paper in between, so you don’t have any annoying scraps of paper in your hand.
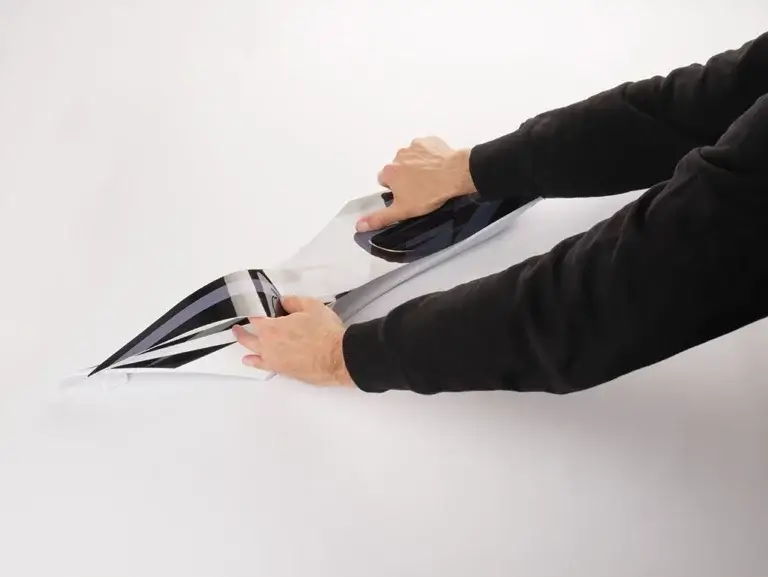
Step 5: Align the film again and again when sticking to make sure that you do not run over edges. You can decide for yourself how much of the backing paper to remove and apply – either a lot of small steps or a few large steps – depending on what you think you can do.
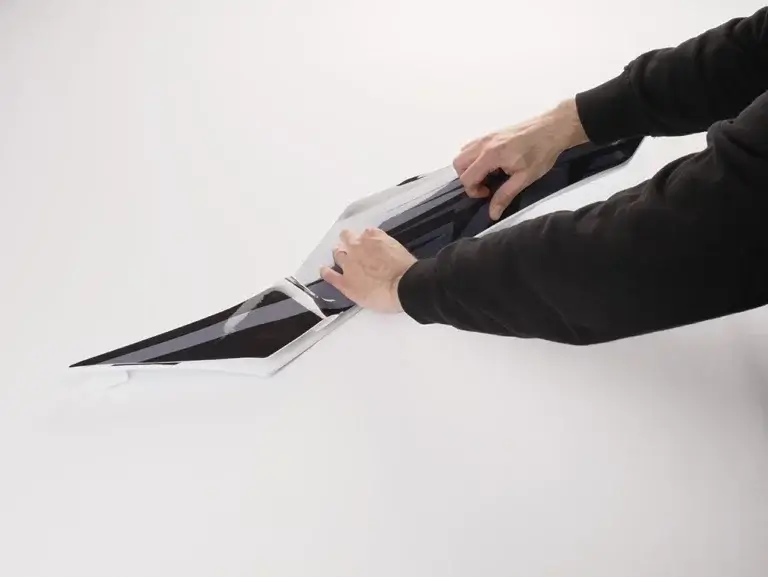
Step 6: If the direction is right, the press everything down again and spread out until the entire part is applied.
It can happen that the last piece doesn’t fit as it was positioned. Thanks to our flexible acrylic adhesive, the film can be easily realigned.
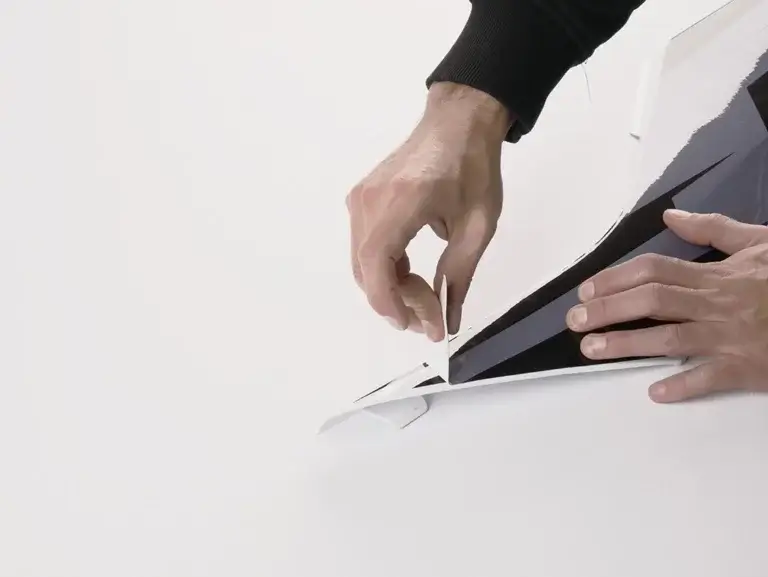
Step 1: If a spot doesn’t fit, simply lift the film again – if possible, generously so that there is enough pace to adapt, so there are no creases. Please peel off the film only when it is cold to avoid warping.
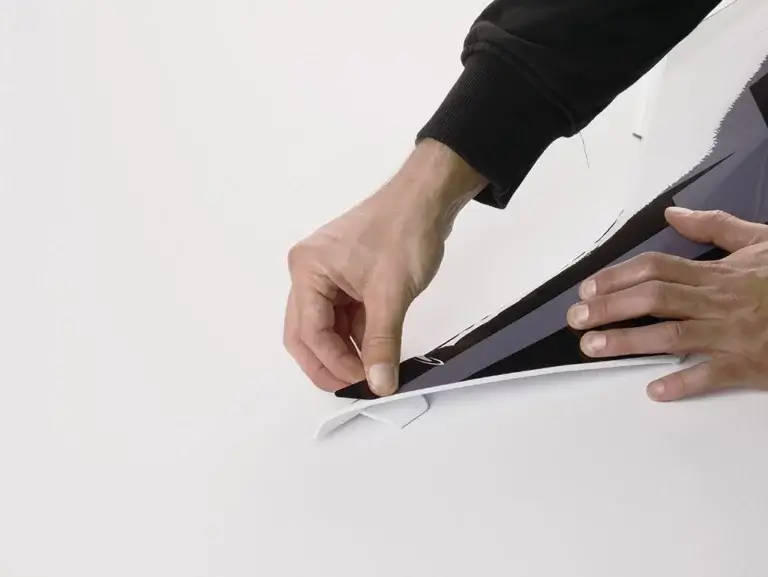
Step 2: Now pull the film into the correct position, adding a little heat if necessary to make the film soft and therefore pliable.
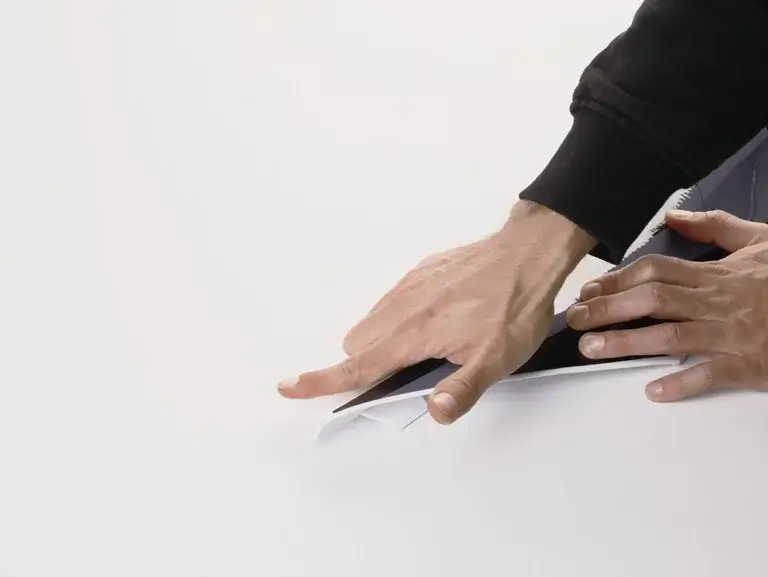
Step 3: If the positon is correct, then press everything back on and spread out. If wrinkles form after a short time (e.g. on strongly curved surfaces), heat them up again and smooth out until they do not come back.
If the applying worked well and the graphics fits the way you imagined it, then it’s time for the finish. This last step is important in order to fully activate the adhesive and thus give your graphics the optimum adhesive force and thus durability.
You start by heating the entire part again. When everything is well warmed up, press the entire area again firmly with your fingers. The adhesive is activated by adding pressure and heat.
For a perfect result, you can repeat this step again with all edges. This ensures that the corners stick well and cannot be easily lifted by external influences (trouser seams, boots, steaming too close, etc.).
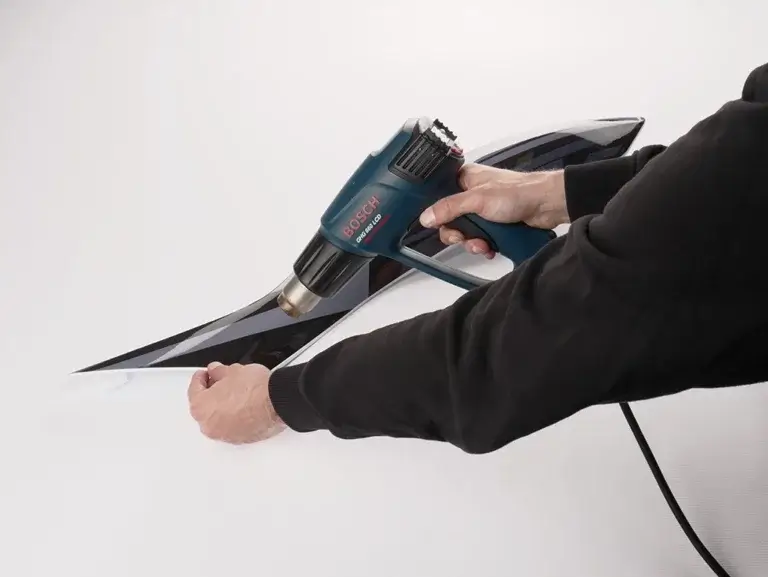
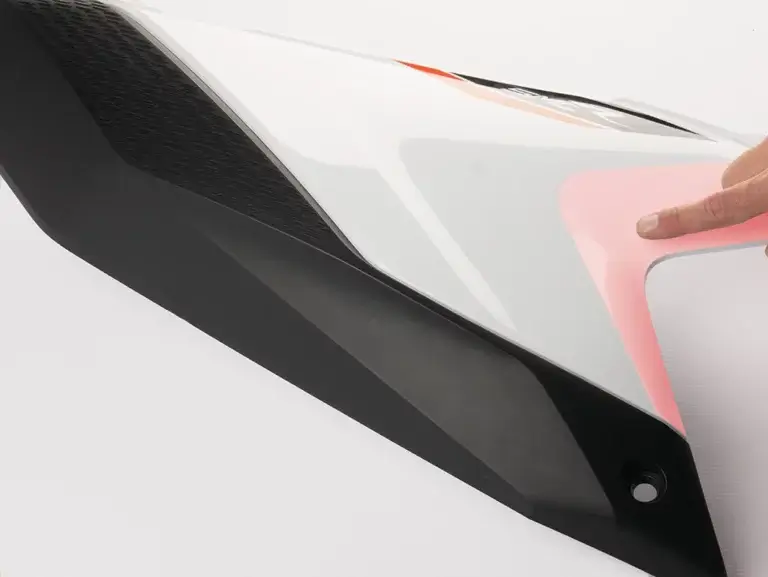
If you are applying a part with strong bulge/ indentation, it is important that the film is applied without „tension”. Read below for the best approach to tricky parts.
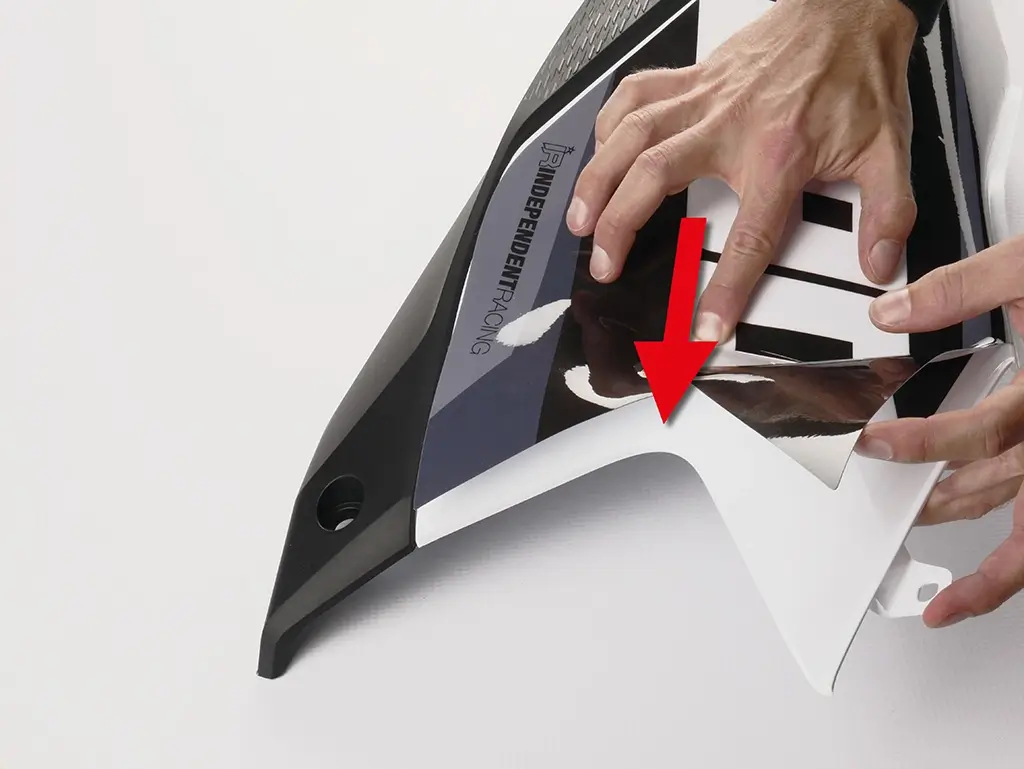
Everything else should be firmly applied to the edge. From the beginning, the graphic should be spread in one direction but not yet completely pressed on.
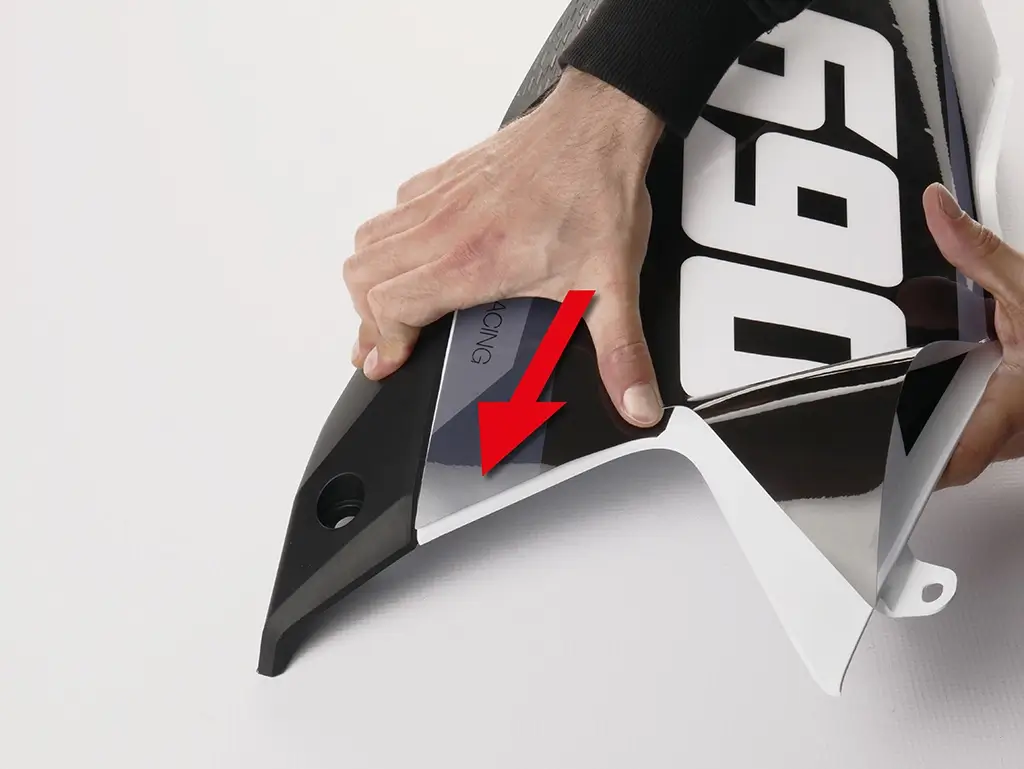
If the upper part is applied, then the film is first smoothed into one…
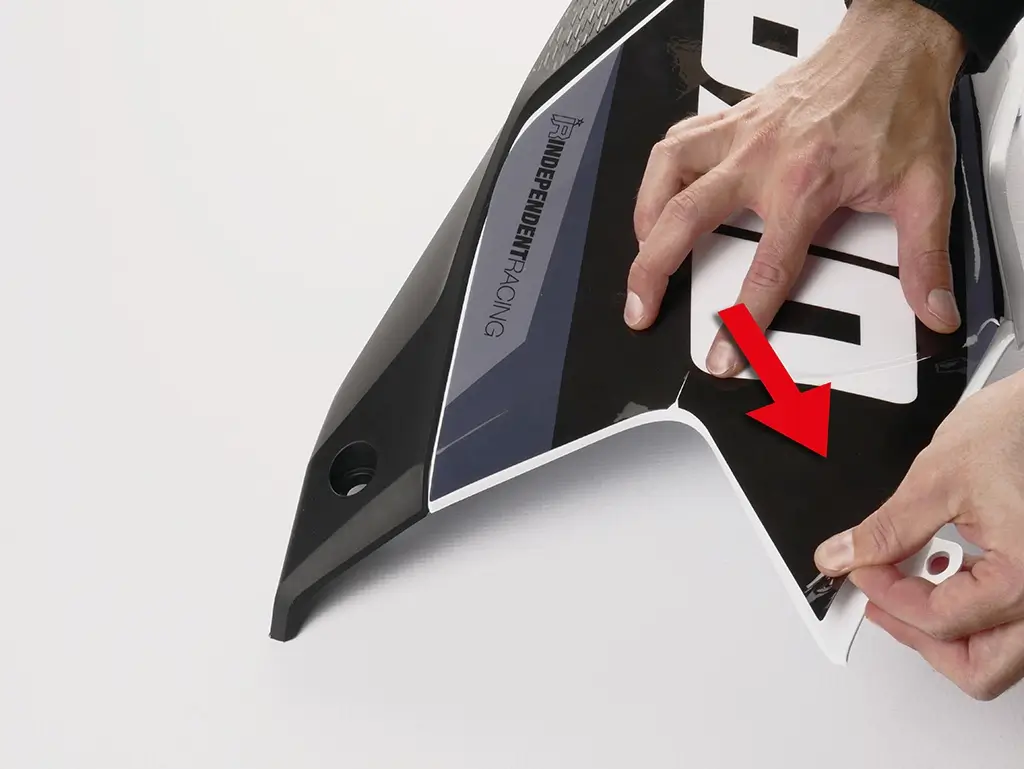
… then streaked in the other direction. In this way you avoid that it is already fixed in the middle and cannot be worked into its shape without tension.
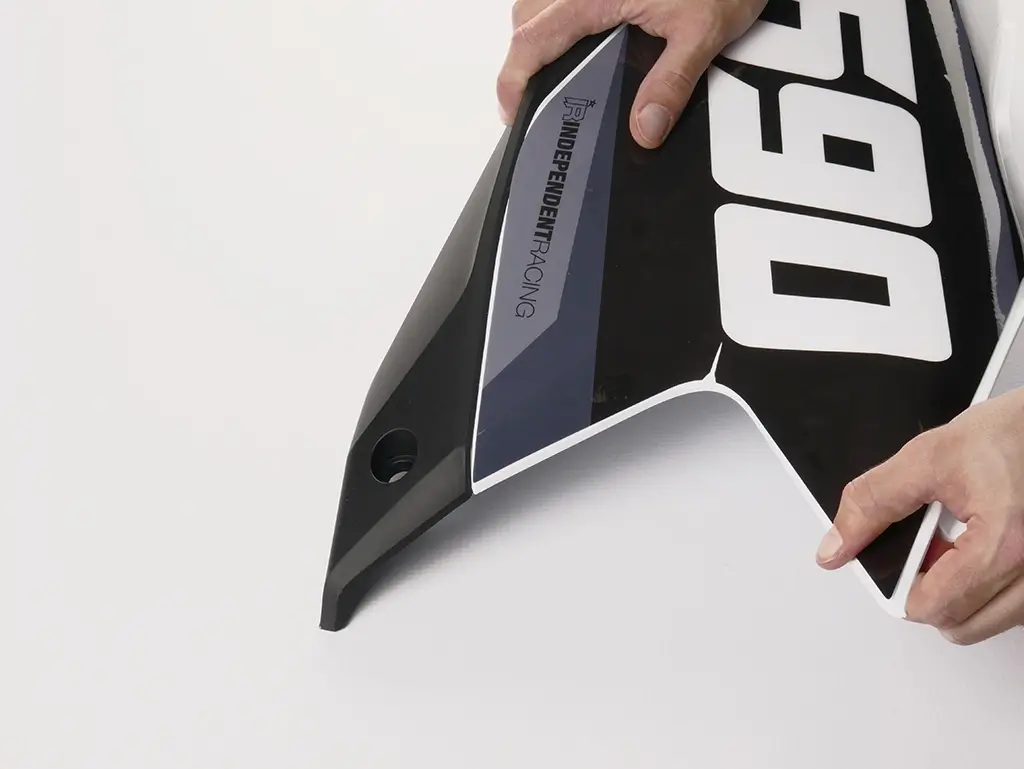
Once everything is tension-free, you can heat and press the film – this should make it adhere securely without peeling off again.
Delivery Time:
4-7 days after payment
Husqvarna FS 450 19 – 22 Graphics | Factory 3A
52.47 € – 73.48 €Price range: 52.47 € through 73.48 € incl. VAT
52.47 € – 73.48 €Price range: 52.47 € through 73.48 € incl. VAT
52.47 € – 73.48 €Price range: 52.47 € through 73.48 € incl. VAT
52.47 € – 73.48 €Price range: 52.47 € through 73.48 € incl. VAT
52.47 € – 73.48 €Price range: 52.47 € through 73.48 € incl. VAT
52.47 € – 73.48 €Price range: 52.47 € through 73.48 € incl. VAT
52.47 € – 73.48 €Price range: 52.47 € through 73.48 € incl. VAT
52.47 € – 73.48 €Price range: 52.47 € through 73.48 € incl. VAT
52.47 € – 73.48 €Price range: 52.47 € through 73.48 € incl. VAT
Übersicht über dein Kundenkonto
Übersicht über deine Adressen
Übersicht über deine Bestellungen
Hier kannst du dein Passwort ändern
Overview of your customer account
Overview of your addresses
Overview of your orders
Change your password here
You are currently viewing a placeholder content from Vimeo. To access the actual content, click the button below. Please note that doing so will share data with third-party providers.
More InformationYou are currently viewing a placeholder content from YouTube. To access the actual content, click the button below. Please note that doing so will share data with third-party providers.
More InformationYou need to load content from reCAPTCHA to submit the form. Please note that doing so will share data with third-party providers.
More InformationYou are currently viewing a placeholder content from Facebook. To access the actual content, click the button below. Please note that doing so will share data with third-party providers.
More InformationYou are currently viewing a placeholder content from Google Maps. To access the actual content, click the button below. Please note that doing so will share data with third-party providers.
More InformationYou are currently viewing a placeholder content from Google Maps. To access the actual content, click the button below. Please note that doing so will share data with third-party providers.
More InformationYou are currently viewing a placeholder content from Vimeo. To access the actual content, click the button below. Please note that doing so will share data with third-party providers.
More InformationYou are currently viewing a placeholder content from YouTube. To access the actual content, click the button below. Please note that doing so will share data with third-party providers.
More InformationYou are currently viewing a placeholder content from Instagram. To access the actual content, click the button below. Please note that doing so will share data with third-party providers.
More Information